

Every barista knows that coffee is more than just an espresso. The milk you pour on top can lift the drink from average to memorable.
Milk texturing 101 is all about getting the balance right, silky milk that blends smoothly with the espresso, leaving behind that smooth mouthfeel customers expect.
When milk texturing is done well, your cappuccino is rich, your flat white is creamy, and your latte has that glossy finish perfect for latte art. When it’s done poorly, you get bubbles, burnt flavours, or watery milk that separates in the cup.
What Is Microfoam?
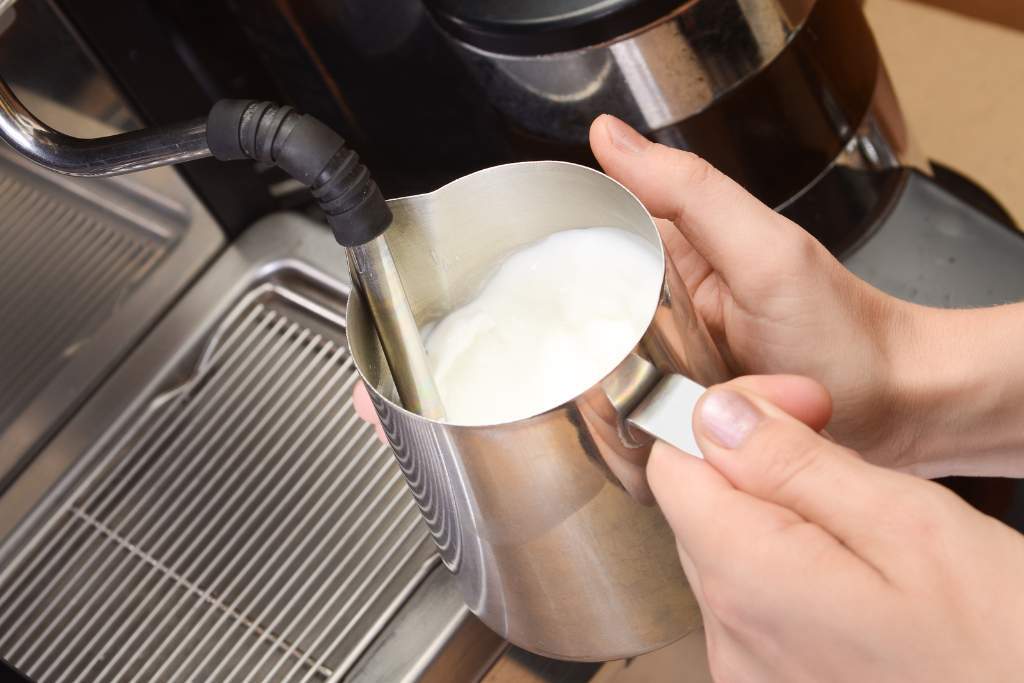
At the heart of milk texturing 101 is latte microfoam. This isn’t just froth; it’s a carefully built emulsion of air and milk proteins. The goal is to create a texture that looks shiny in the jug and pours like wet paint. Microfoam should feel silky on the tongue, not airy or bubbly.
Milk proteins play a crucial role here. As air is introduced through the steam wand, proteins stabilise the bubbles, keeping them small and uniform. This stability is what lets your foam hold up long enough to pour patterns and deliver that velvety texture customers love.
The Role of Temperature
Milk is delicate. Heat it too quickly and you’ll end up with scorched flavours. Heat it too little and the foam collapses before you’ve even lifted the jug. The sweet spot is between 55°C and 65°C. At this range, natural sugars shine through, and the milk develops a creamy sweetness.
Baristas often rely on touch: when the jug becomes almost too hot to hold, you’re likely in the right zone. But as you train, a thermometer is invaluable. Beyond 70°C, milk proteins break down, leaving behind a dull, flat taste. It’s one of the most common milk-frothing mistakes. But it’s also the easiest to avoid..
Common Milk Frothing Mistakes to Avoid
Even experienced baristas slip up when they’re in a rush.
These are the mistakes worth watching for:
- Wrong wand placement. Hold the steam tip just below the surface to introduce air at the start, then dip slightly deeper to roll the milk.
- Stop at 65°C to keep the sweetness. Beyond 70°C, milk loses its charm.
- Reusing milk. Once milk is steamed, don’t refroth it. Fresh, cold milk always gives better results.
- Skipping the swirl. Swirl and tap the jug before pouring to blend the foam with liquid milk.
Practising the Pour
Perfect milk isn’t much use if you don’t pour it properly. Begin by holding the jug high and steady so the milk cuts through the crema. As the cup fills, bring the jug closer and start tilting it slightly to let the microfoam rise to the surface.
Consistency comes with repetition. Your first pours may look like blobs instead of hearts or tulips. That’s normal. Every professional barista has been there. Over time, you’ll find your rhythm and discover how jug angle, height, and speed all affect the outcome.
Cleaning and Technique Habits
Baristas sometimes focus so much on frothing that they forget the basics of cleanliness and routine. Always purge your steam wand before and after use. Wipe it with a damp cloth to stop dried milk from building up. These small habits prevent flavour contamination and keep your equipment working properly.
Another pro tip is to practise with water and a drop of dishwashing liquid. This mix foams in a similar way to milk, letting you refine your steaming and pouring without wasting dairy or alternatives. It’s a simple trick that saves money and builds muscle memory.
Moving Beyond Basics
Once you can texture milk consistently, latte art becomes achievable. Simple patterns like hearts and leaves rely entirely on the microfoam’s glossy texture. Without it, designs collapse or separate. That’s why barista trainers insist that students master latte microfoam before attempting advanced pours.
Structured training can speed this up. A short course explains the science. More importantly, it gives you hands-on practice with feedback from industry professionals. This is often the difference between knowing the theory and being job-ready behind the machine.
Ready to master milk texturing? Enrol in our Barista Coffee Course and learn hands-on from expert trainers in Melbourne. Want to take your skills further? Try our Latte Art Course or browse our full range of hospitality courses.
Milk Texturing 101: Frequently Asked Questions
How do I stop big bubbles forming in milk froth?
Big bubbles mean the steam wand was too close to the surface for too long. Keep the tip just under the milk when you start, then sink it slightly to roll the liquid. Swirling the jug afterwards helps blend out any stray bubbles before pouring.
Can I reheat or refroth milk for another coffee?
No. Reheating milk removes sweetness and ruins the foam. Once milk has been frothed, its proteins are already stretched and won’t hold structure again. For the best latte microfoam, always use fresh, cold milk straight from the fridge for every cup.
Is latte art possible without perfect microfoam?
Not really. Patterns like rosettas rely on foam with a glossy, paint-like texture. Without proper microfoam, designs won’t hold shape. The good news? Once you’ve mastered milk texturing 101, art becomes much easier to attempt and improve over time.